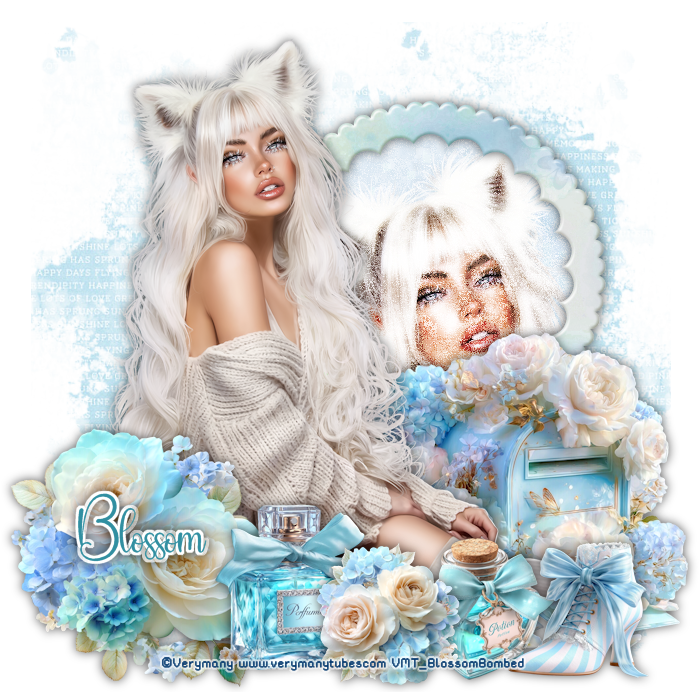
This tutorial is written in PSPX9 but with working knowledge of the program, any version will work.
We will make the tag above with this tutorial
(or something similar if your using different materials)
SUPPLIES:
Tube of choice
I'm using "Yuki Kitsune" by Verymany.
You need to purchase this tube and have a license to use it.
PTU matching kit "Yuki Kitsune" by Tiny Turtle
You can purchase this kit HERE
My texture you can download HERE.
Mask "Autumn Mask 02" by Toxic Desirez
Plugins Used: Xero Porcelain and Xero Radiance
Fonts: Rainyhearts for credits/copyright and Boho for name
Lets begin
*REMEMBER TO SAVE YOUR WORK AS YOU GO ALONG*
This tutorial is only written as a guide to inspire. Please feel free to use your own tube, kit, and other supplies and make this your own creation.
Open tube and mask (these will be used shortly)
Create New Image 700x700 pixels, transparent
Open (4) - Copy and close
Paste as new layer on your blank image
Resize 80%
Laers - New Mask Layer- From Image
In dropdown menu choose the toxic mask
Layers - Merge - Merge Group
*You can close out the original mask image now*
Open (52) - Copy and close
Paste As New Layer
Using magic wand, click in center of frame
Selection - Modify - Expand 2
Open (8) - Copy - Close
Paste As New Layer
Selections - Invert and click Delete button
Selections - Invert
Select your tube image and copy and minimize
On your working canvas : Paste As New Layer
*I am using the full size layer of the tube I chose*
Resize 60%
Position tube in selection as desired (I chose the face and fox ears)
Selections - Invert and click your Delete button
Selections - Invert
Open my texture - Copy and close it
Paste As New Layer
Selections - Invert - Delete button
Select None
Working with your layer palette your top layer should be selected (Raster 4)
Duplicate this layer
In layer palette select Raster Layer 4 (copy of tube)
Apply Xero - Porcelain with these settings:
Softness 32 Strength 5 Red 75 Green 9 Blue 84
Exposure 12 Contrast -26 Saturation 17
In layer palette select Raster 4 (original tube layer)
Apply Xero - Radiance using these settings:
Strangeness: 701 Charm: 32 Truth: 139 Beauty: 235
In layer palette change the propertie to Screen and opacity to 72
In layer palette close visibility on Raster 1, Group -Raster 2
Merge Visible
Open visibility on all layers again
In layer palette drag "Merged Layer below Raster 2 layer
Select Raster 2 (Should be top layer now)
Your layer palette should be labeled and look like this:
Raster 2 (frame) - Highlighted
Merged (merged plugin layers)
Group Raster 2 (mask)
Raster 1 (blank)
Add dropshadow of choice to frame
Merge Raster 2 down 1x
Position frame near top right of mask on canvas
Restore tube - Copy and close
Paste As New Layer
Resize 45%
Add dropshadow
Open (12) - Copy and close
Paste As New Layer
Resize 45%
Position right side of tube
Add drop shadow
In layer palette move this layer below tube layer and select tube layer again (top layer)
Open (61) - Copy and close
Paste As New Layer
Resize 35%
Position left bottom of canvas
Add dropshadow
Open (78) - Copy and close
Paste As New Layer
Resize 25%
Position right side of flower cluster
Add dropshadow
Open (148) - Copy and close
Paste as New Layer
Resize 20%
Position in front of tube's knees
Add drop shadow
Open (141) - Copy and close
Paste As New Layer
Resize 20%
Position right side of potion bottle
add dropshadow
Open (56) - Copy and close
Paste As New Layer
Resize 20%
Position between bottles
Add dropshadow
Merge Layers - Visible
Using mover tool slide the image up on canvas just slightly
Add copyright/credits
Merge Visible
Add name
Save as ,png
And you are done!


No comments:
Post a Comment